
ファイルの属性の取得
ファイルの属性を取得をするには、以下のようにします。
System.IO.FileAttributes attr = System.IO.File.GetAttributes(input_path);ここで取得されるSystem.IO.FileAttributesはEnum列挙体なので数値になります。
以下がFileAttributesの内容です。
System.IO.FileAttributes列挙体
| 名称 | 値(16進数) | 値(10進数) | 説明 |
|---|---|---|---|
| ReadOnly | 0x1 | 1 | 読み取り専用です。 |
| Hidden | 0x2 | 2 | 隠しファイルです。 |
| System | 0x4 | 4 | ファイルはシステム ファイルです。オペレーティング システムの一部であるか、オペレーティング システムによって排他的に使用されます。 |
| Directory | 0x10 | 16 | ディレクトリです。 |
| Archive | 0x20 | 32 | バックアップまたは削除の候補です。 |
| Device | 0x40 | 64 | 将来使用するために予約されています。 |
| Normal | 0x80 | 128 | 特別な属性を持たない標準ファイルです。 |
| Temporary | 0x100 | 256 | 一時ファイルです。 一時ファイルには、アプリケーションを実行中は必要で、アプリケーションを終了すると不要になるデータが含まれています。一時ファイルが不要になったら、アプリケーションが直ちに削除する必要があります。 |
| SparseFile | 0x200 | 512 | スパース ファイルです。 スパース ファイルは、通常、データの大部分が 0 である大きなファイルです。 |
| ReparsePoint | 0x400 | 1024 | ファイルには、ファイルまたはディレクトリに関連付けられたユーザー定義のデータ ブロックである、リパース ポイントが含まれています。 |
| Compressed | 0x800 | 2048 | 圧縮ファイルです。 |
| Offline | 0x1000 | 4096 | オフラインです。オフラインのファイルのデータは、即時には使用できません。 |
| NotContentIndexed | 0x2000 | 8192 | ファイルは、オペレーティング システムによるコンテンツ インデックス サービスでインデックスされません。 |
| Encrypted | 0x4000 | 16384 | ファイルまたはディレクトリは暗号化されています。 |
| IntegrityStream | 0x8000 | 32768 | ファイルまたはディレクトリには、データ整合性のサポートが含まれます。 |
| NoScrubData | 0x20000 | 131072 | ファイルまたはディレクトリは、データ整合性のスキャン対象から除外されます。 |
戻り値について
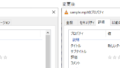
試しに以下のようにテキストファイルを読み取り専用で作成しました。
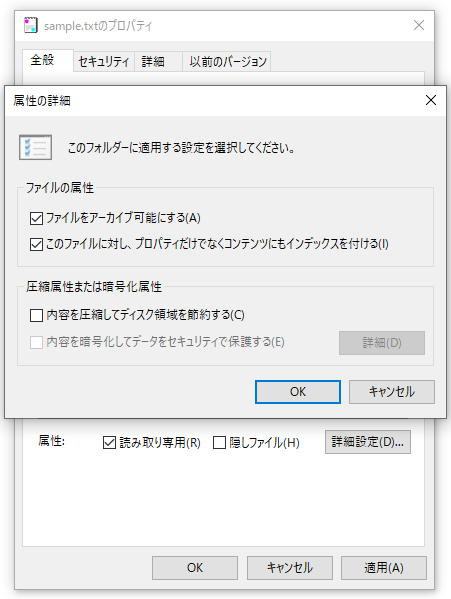
このファイルの属性を取得してみます。

イミディエイトウィンドウで数値を確認しました。

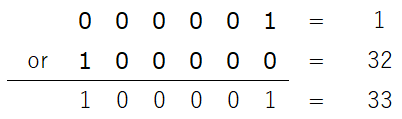
変数attrが「ReadOnly|Archive」になってます。これは上記の表の数値に直すと「0x1 | 0x20」になります。
さらに崩すと「1 or 32」ということです。「1 or 32」は10進数でいうと33になります。
意味がまだ分からない方のためにもう少し詳しく説明します。
or は2進数で考えます。or演算の表の作成しました。
| 0 | or | 0 | = | 0 |
| 0 | or | 1 | = | 1 |
| 1 | or | 0 | = | 1 |
| 1 | or | 1 | = | 1 |
これをもとに1と32でor計算します。
まず1と32を2進数にします。2進数にしたものを1桁ずつ先ほどの表と照らし合わせor演算を行います。
or演算は+演算と違い、繰り上がりしないので注意です。
2進数で「1+1=10」ですが「1 or 1=1」なのです。
なぜこんな話をしているかというと上記の列挙体の中に33という数値はありません。
そのため、以下のように比較しても通りません。
if (attr == System.IO.FileAttributes.ReadOnly)
{
    Console.WriteLine("読取専用");
}
この辺で鋭い方は気づいておられるかと思いますが、FileAttributes列挙体は以下のように構成されるよう数値が設定されています。
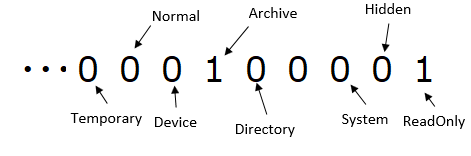
つまり1がたっているところが属性が有効になっているということになります。
そこでAnd演算を行います。And演算以下の表になっています。
| 0 | and | 0 | = | 0 |
| 0 | and | 1 | = | 0 |
| 1 | and | 0 | = | 0 |
| 1 | and | 1 | = | 1 |
このand演算があれば、確認したいBitが立っているところだけ取得できます。
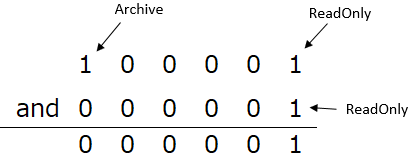
これは、よくフィルタリングと呼ばれます。これをコードで書くと以下のようになるかと思います。
if ((attr & System.IO.FileAttributes.ReadOnly) == System.IO.FileAttributes.ReadOnly)
{
    Console.WriteLine("読取専用");
}
(attr & System.IO.FileAttributes.ReadOnly)がフィルタリングしているところです。ReadOnlyではなければ0が返ります。
以上、踏まえて改めてソースコードを紹介します。
ファイルの属性の取得(ソースコード)
//ファイルの属性を取得
System.IO.FileAttributes attr = System.IO.File.GetAttributes(input_path);

if ((attr & System.IO.FileAttributes.ReadOnly) == System.IO.FileAttributes.ReadOnly)
{
    Console.WriteLine("読取専用");
}
if ((attr & System.IO.FileAttributes.Hidden) == System.IO.FileAttributes.Hidden)
{
    Console.WriteLine("隠しファイル");
}
if ((attr & System.IO.FileAttributes.System) == System.IO.FileAttributes.System)
{
    Console.WriteLine("システム ファイル");
}
if ((attr & System.IO.FileAttributes.Directory) == System.IO.FileAttributes.Directory)
{
    Console.WriteLine("ディレクトリ");
}
if ((attr & System.IO.FileAttributes.Archive) == System.IO.FileAttributes.Archive)
{
    Console.WriteLine("アーカイブ");
}
if ((attr & System.IO.FileAttributes.Device) == System.IO.FileAttributes.Device)
{
    Console.WriteLine("将来使用するために予約されています。");
}
if ((attr & System.IO.FileAttributes.Normal) == System.IO.FileAttributes.Normal)
{
    Console.WriteLine("特別な属性を持たない標準ファイル");
}
if ((attr & System.IO.FileAttributes.Temporary) == System.IO.FileAttributes.Temporary)
{
    Console.WriteLine("一時ファイル");
}
if ((attr & System.IO.FileAttributes.SparseFile) == System.IO.FileAttributes.SparseFile)
{
    Console.WriteLine("スパース ファイル");
}
if ((attr & System.IO.FileAttributes.ReparsePoint) == System.IO.FileAttributes.ReparsePoint)
{
    Console.WriteLine("リパース ポイントが含まれています。");
}
if ((attr & System.IO.FileAttributes.Compressed) == System.IO.FileAttributes.Compressed)
{
    Console.WriteLine("圧縮ファイル");
}
if ((attr & System.IO.FileAttributes.Offline) == System.IO.FileAttributes.Offline)
{
    Console.WriteLine("オフライン");
}
if ((attr & System.IO.FileAttributes.NotContentIndexed) == System.IO.FileAttributes.NotContentIndexed)
{
    Console.WriteLine("ファイルは、OSによるコンテンツ インデックス サービスでインデックスされません。");
}
if ((attr & System.IO.FileAttributes.Encrypted) == System.IO.FileAttributes.Encrypted)
{
    Console.WriteLine("暗号化");
}
if ((attr & System.IO.FileAttributes.IntegrityStream) == System.IO.FileAttributes.IntegrityStream)
{
    Console.WriteLine("データ整合性のサポート");
}
if ((attr & System.IO.FileAttributes.NoScrubData) == System.IO.FileAttributes.NoScrubData)
{
    Console.WriteLine("データ整合性のスキャン対象から除外");
}
ファイルの属性の設定
ファイルの属性を設定をするには、以下のようにします。
System.IO.File.SetAttributes(input_path, attr);これでファイルの属性は、attrの数値の内容になります。attrの中身に関してはこの記事の取得のところで説明しているので割愛します。
ここで注意なのですが、ここで設定したattrの値になるので注意です。
読取専用ファイルを隠しファイルにしようとします。でも以下のようにすると隠しファイルにはなりますが、そのほかの属性は外れてしまいます。
System.IO.File.SetAttributes(input_path, System.IO.FileAttributes.Hidden);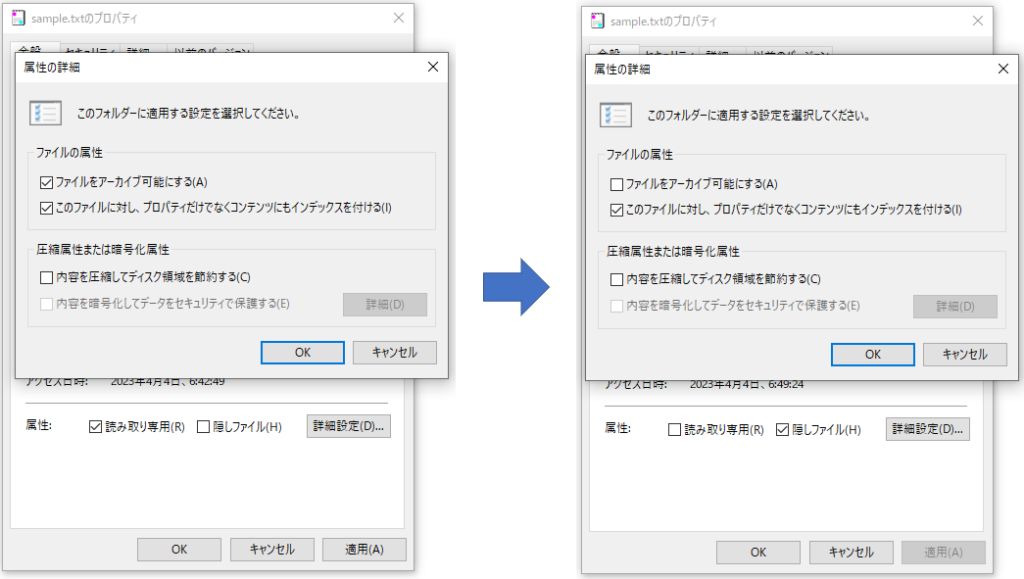
なのでSetAttributesするときは必要な属性をすべてセットしてあげる必要があります。
ファイルの属性の設定(ソースコード)
もともとあるファイルに隠しファイル属性を追加するソースコードの例です。
//ファイルの属性を取得
System.IO.FileAttributes attr = System.IO.File.GetAttributes(input_path);

//ファイルの属性を設定
System.IO.File.SetAttributes(input_path, attr | System.IO.FileAttributes.Hidden);
こうすることで元の属性を変更せず、隠しファイルの属性を追加することができます。
まとめ
andやor演算が慣れるまでは大変かと思いますが、一つの数値の変数で複数の状態を管理できるというのは便利です。
私のまわりでもandやorが理解できていない開発者は、結構います。
これを使いこなせると「コイツやるな!」って私は思います。
ソースもすっきりしたりするので、身に着けておいて損はないと思います。
この記事が皆様のお役に立てたら幸いです。

コメント